Wednesday, 9 May 2012

Cheese Cake!

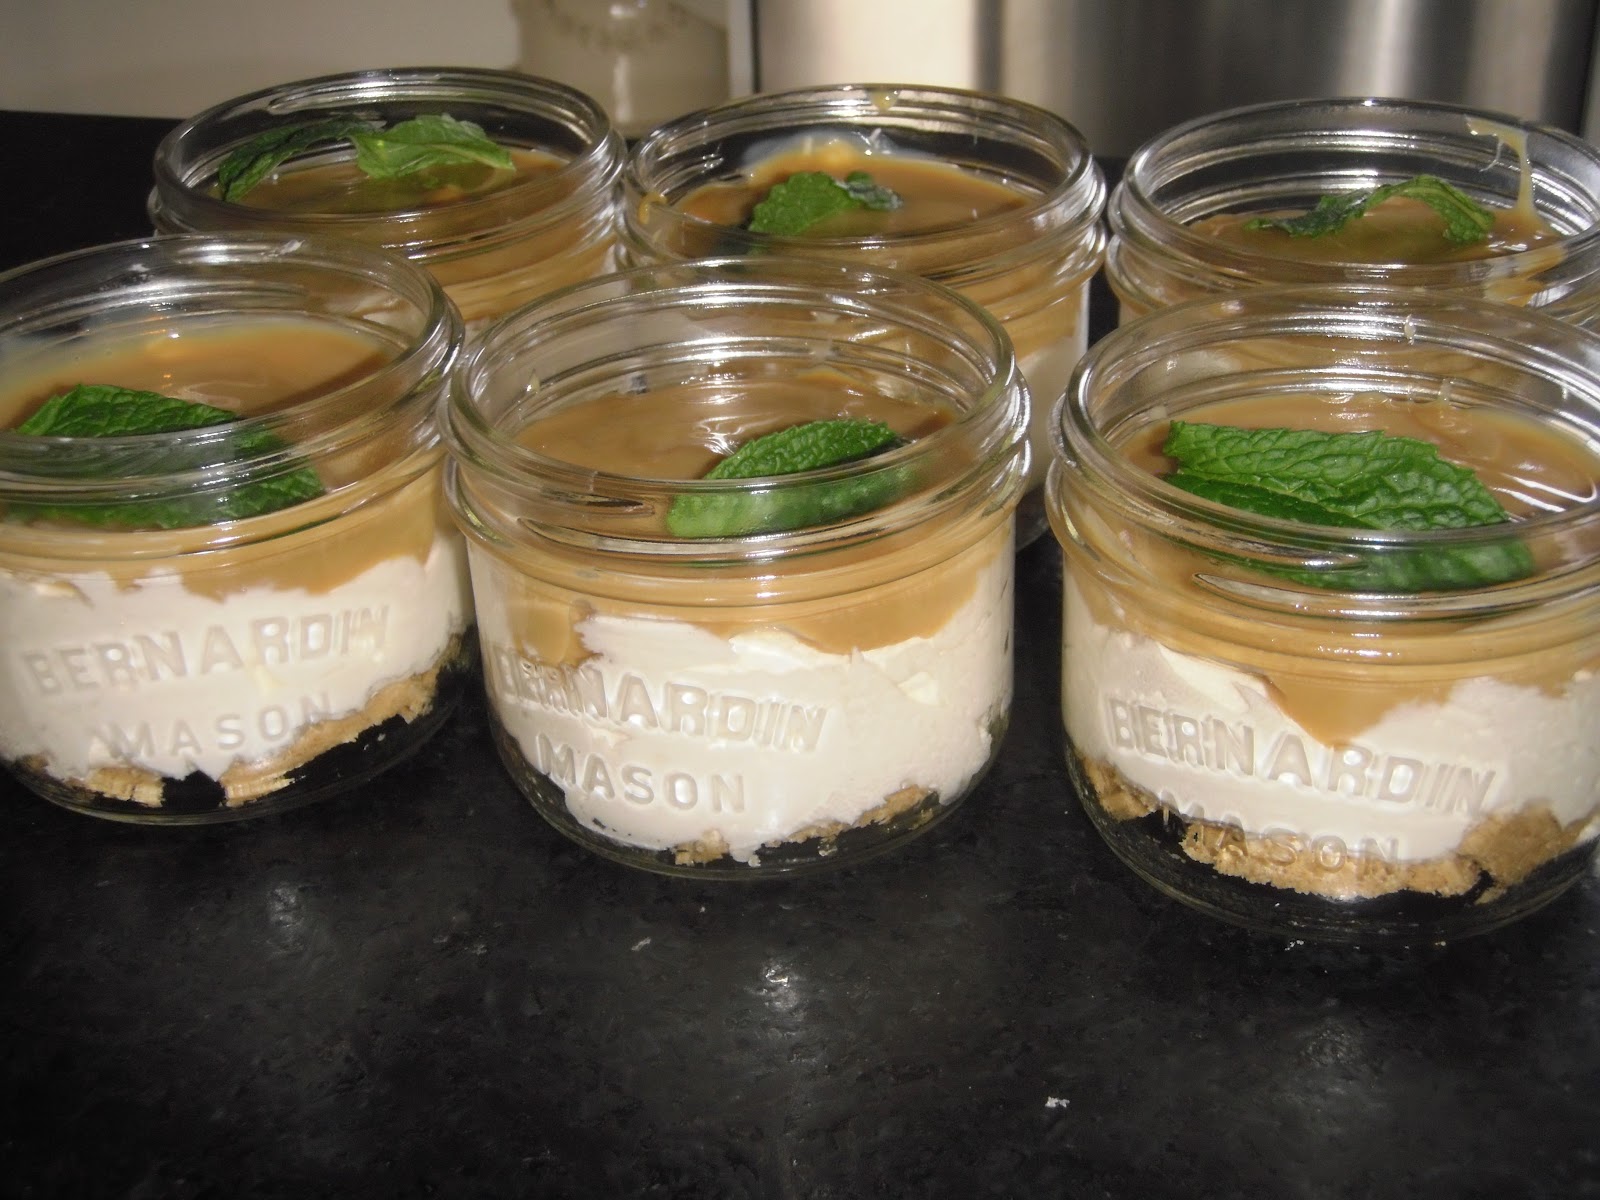
This is the best cheese cake recipe ever. It is simple. It is easy. And it is deliciously good.

Very minimal ingredients here: Graham cracker bottom, cream cheese, whipped cream, a bit of sugar and a can of condensed milk. Easy breezy!


AMOUNTS: (To make 6 individual sized cheese cakes)

1 9 inch graham cracker crust (I bought one prepared, you could make it from scratch if you wanted)
1 package of cream cheese
1 cup whipped cream (in liquid form)
2 tbsp of sugar (to your taste - use more or less if you want)
1 can sweetened condensed milk

STEP 1:

Using the condensed milk, make caramel topping - see Caramel Recipe in the Baking section.
(Boil condensed milk for 4 hours)


STEP 2:

Blend cream cheese and sugar together until smooth.

STEP 3:

Whip whipped cream until it forms stiff peaks.

STEP 4:

Fold whipped cream into cream cheese mixture.

STEP 5:

Layer the graham cracker, filling mixture and caramel.


STEP 6:

Refridgerate for an hour or so to allow the ingredients to settle and form.


STEP 7:

Make sure you having someone helping you eat them!
As I mentioned before, Josh and I have been together for 4 years but only recently have our parents met. I served this for the occasion and I think everyone enjoyed it, especially in the cute mason jars.


Monday, 7 May 2012

Chocolate Cake

Mmmmmm: Chocolate Cake!!

I have been experimenting with making my own icing - chocolate peanut butter, chocolate coconut, cream cheese, etc. I really don't like the buttery taste of Butter Cream Icing so I am trying to cover that flavour up a bit.

I actually meant to make chocolate cake with a cream cheese butter cream icing the other night but my blender finally died on me!!! It was a cheap little hand held blender that I've had for 7+ years. I knew the end was near because each time I used it it was getting that hot burnt smell...so I guess it was finally time. But.... that meant that I had to hand stir the icing and there was no way I was going to be able to get all of the little pieces of cream cheese smooth. I tried putting it into a piping bag anyways but NOPE...those darn little pieces kept clogging up the tip. I could have just knifed it on but I really wanted to try something different with it with the piping bags.

SO: The icing got packaged up into the freezer for another day once I get a new blender to beat it smooth and use it how I intended to.

I would have just stopped but I promised a certain person a cake that evening so a cake was needed.

(Just a note: I even tried straining the icing...but it was too thick - our kitchen was a disaster!)

Luckily, I did have prepared icing in the pantry so this is what I made: A complete cake out of a box and icing from a container! I bake most items from scratch, but I'm not opposed to getting a bit of help, especially when it tastes so good!


Thursday, 3 May 2012

Caramel Popcorn

Another caramel post! Caramel Popcorn! I could eat anything that had caramel on it - I love it so much.


Traditional caramel popcorm has tons of sugar in it, although you can't really take out a whole lot since it is caramel. But I decided to make it by excluding the usual corn syrup and it turned out great and you can't even notice the difference, definitely worth the savings (of calories and ingredients).

INSTRUCTIONS:

Pre heat oven to 250 F.

Pop 1/2 cup of plain popcorn (do not use buttered, mircowaved popcorn, for example). This will yeild about 8 cups of popcorn.


In a sauce pan, melt 1/2 cup butter with 1/2 cup brown sugar and a tsp or two of vanilla. Bring to a quick boil and reduce heat, stirring constantly. Caramel is produced!


On a couple of cookie sheets, spread out popcorn and pour the sugar mixture over the popcorn, mixing lightly.


Place in oven for 45-60 minutes. This is the key! Through this slow heating process, the caramel adheres to the popcorn and dries out creating a nice smooth non-sticky layer to the cruchy light popcorn.


Now EAT EAT EAT!


Pizza Pizza!

When we buy tortillas we always have way too many left over from the original purpose of buying them. There are so many in a package! After 2 or 3 meals of using them in some way or another we are all tortillaed out.

Solution: They actually freeze great so if you don't want to live off of them for a half a week like we were doing, pop them into the freezer and save them for another day.

Recently, we made a make shift vege pizza with the frozen tortillas. It was so good because we (me more than Josh) love thin crust and that's exactly what it was.

If coming from a frozen state, let the tortilla sit out of the freezer for an hour before you plan to use them.

Pre-heat oven to 350 F and top your pizza with anything that you like and whatever you have in the fridge.

We used pasta sauce instead of pizza sauce (can was already opened), green onions, yellow onions, green peppers, and topped with lots of mozzarella cheese.


Place on a cookie sheet and cook until the cheese is nice and melted and the edges are starting to brown up. I believe this went in for about 10 minutes but every oven is different so just monitor it.


It was crunchy and delicious.

Mini homemade pizzas also taste great on pita bread and make nice individual sized ones.


Mason Jar Delight

Now I wish I could take the credit for this delicious dessert, but I can't. It's Dr. Oetker's Milk Chocolate Mousse. Soooo good and way too hard to resist. Just add milk and waaala dessert time.

Some many uses for mason jars!


Bounty Bars?

These are pretty close to a Bounty Bar if you ask me. Josh loves chocolate and coconut....so what better excuse to experiment with those two ingredients! I'm not usually a huge fan of coconut but I'm pretty sure I ate more of these than he did.


Ingredients: Makes a dozen.

8 oz of baking chocolate - I used Bakers semi-sweet
2 cups of sweetened coconut
2 tbsp of coconut milk
1 tsp of coconut extract

Step by Step Directions:
STEP 1:
In a double broiler, melt chocolate.


STEP 2:
Spread 2/3 of the chocolate along the bottom and spread up the sides of the liner.

STEP 3:
Refrigerate until the chocolate has hardened.


STEP 4:
Mix coconut shreds, extract and milk.

STEP 5:
Mold coconut mixture on top of the hardened chocolate - leaving a slight border around the edges.
(left molded in; right to be molded in)


STEP 6:
Spread the rest of the chocolate on top of coconut mixture making sure that it falls down the sides
to connect with the bottom chocolate to create a seal.


STEP 7:
Place back in fridge to harden.

STEP 8:
EAT!!!


After making these little cups I realized that there are endless possible variations - mint and peanut butter are next on my list.


Monday, 30 April 2012

Growing Green Onions from Scraps

Who knew? I sure didn't! But you can take the bottom root piece of that green onion you just cut up for your nachos and re-grow it!!! Am I the only person who thinks this is amazing?

All you have to do is take that bottom piece - it really doesn't matter how dried up or small it is, it will refresh itself - and place the root in shallow water and watch it grow.


Just break off what you need and they will continue to grow!

*I thought I would get more bang for my buck by cutting one root end in half and have it grow into two but it doesn't seem to be working for me - it has been sitting in water for over a week and there haven't been any sprouts - I could have just separated it in an awkward spot though. Does anyone know if this can be done?